
If you are going to use an eSIM on an iPhone, please follow the following steps:
Scan your QR Code:
- Make sure you are connected to the internet through Wi-Fi. This is vital to ensure that your device communicates with Truphone services to activate your eSIM.
- Go to Settings > Cellular.
- Tap “Add Cellular Plan”.
- Use your iPhone to scan the QR code that your carrier provided.
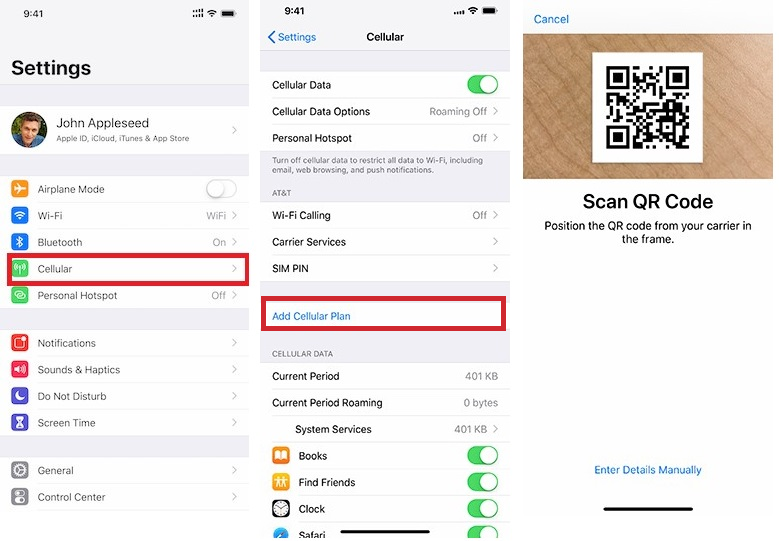
If necessary, you can manually enter your plan information. Simply tap “Enter Details Manually”, at the bottom of your iPhone screen, where you’ll be prompted for activation codes. The email sent from Truphone includes this information, so you can copy and paste these details instead of scanning the QR code.
Label your plans
If you have more than one SIM (or eSIM) in your iPhone, we recommend that you label your plans after activation. For example, you can label your Truphone Enterprise eSIM plan as “Business”, and the other plan “Personal”.
You’ll need to refer to these labels when you choose which phone number to use for making or receiving calls and messages, to designate a number for cellular data, and to assign a number to your contacts.
