How to add a cellular data plan to your iPad
A step-by-step guide


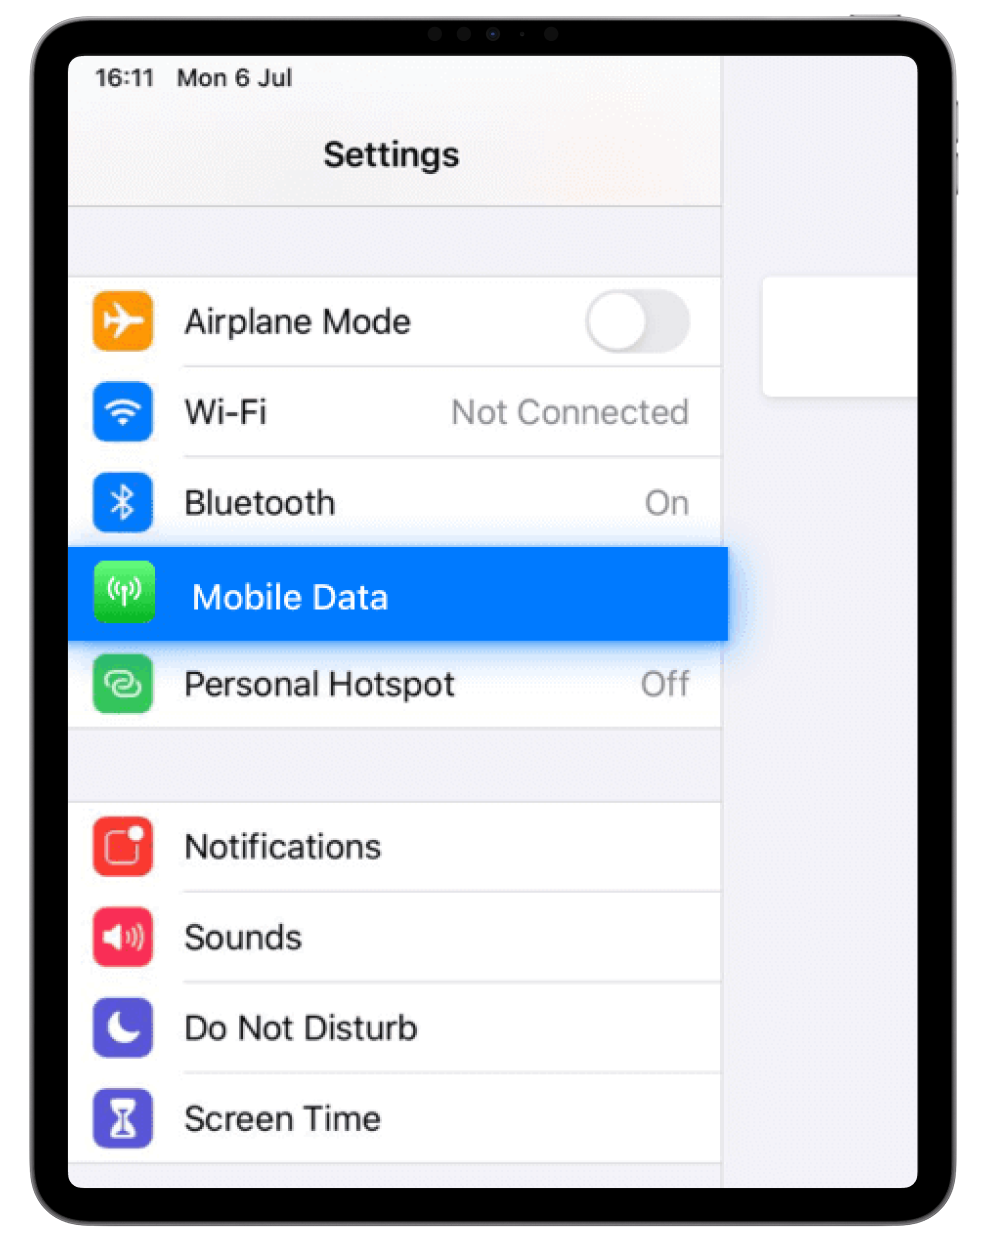
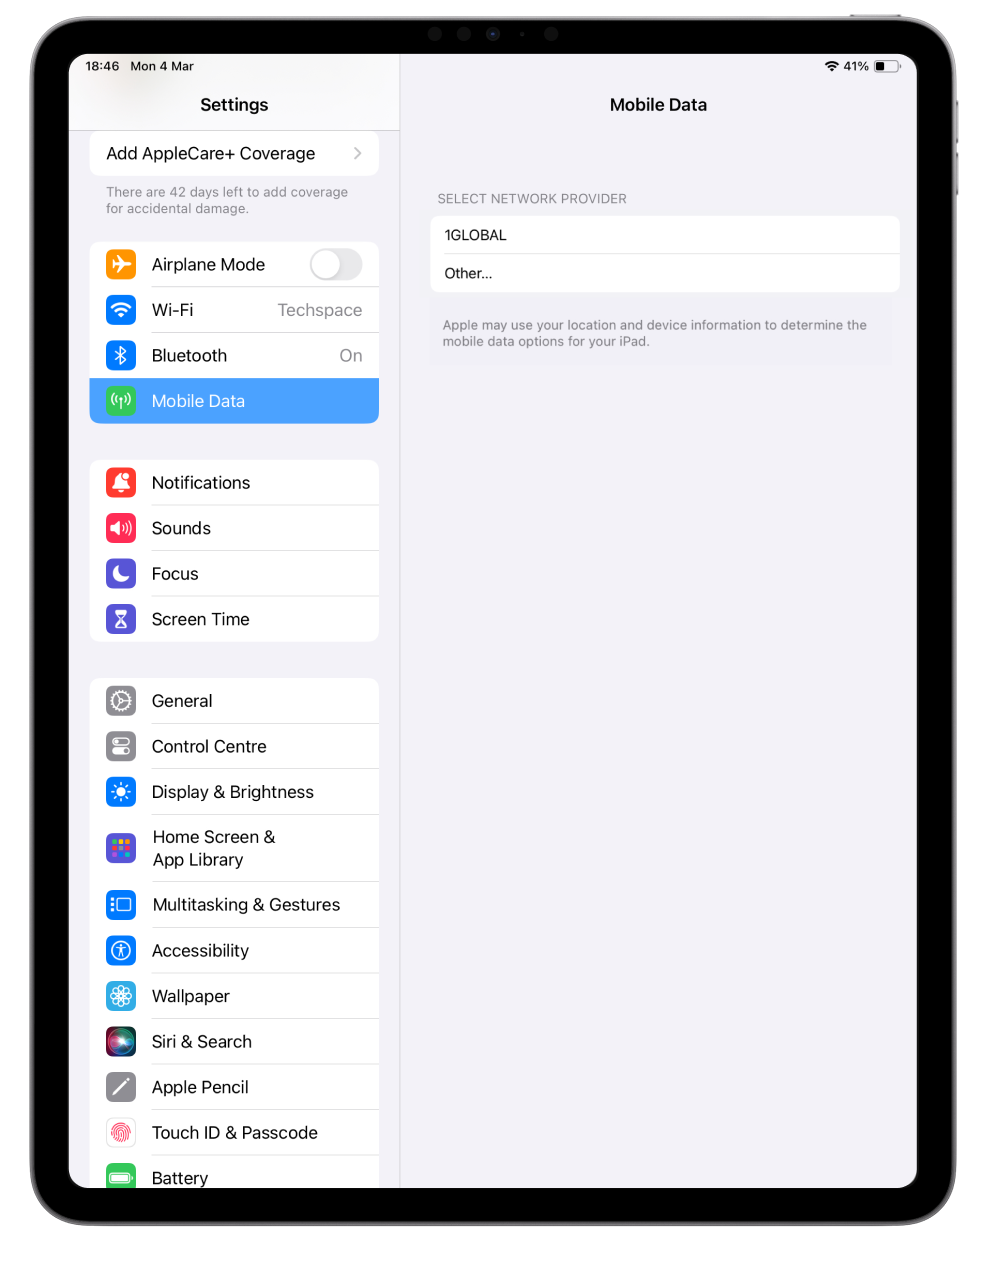
A BetterRoaming data plan can be installed in just a few minutes via the settings app on your iPad. Find out how in our easy-to-follow guide below. Before you add a plan to your iPad, check that it supports eSIM - most iPads built after 2018 will.
The following iPad models support BetterRoaming data plans:
- iPad Pro 11-inch (1st gen or later)
- iPad Pro 12.9-inch (3rd gen or later)
- iPad Air (3rd gen or later)
- iPad (7th gen or later)
- iPad Mini (5th gen or later)
If you’re not sure which model of iPad you have, find out here.
Please also ensure that your iPad is running iPadOS 11 or later. For best results, we recommend updating your device to the latest iPadOS.
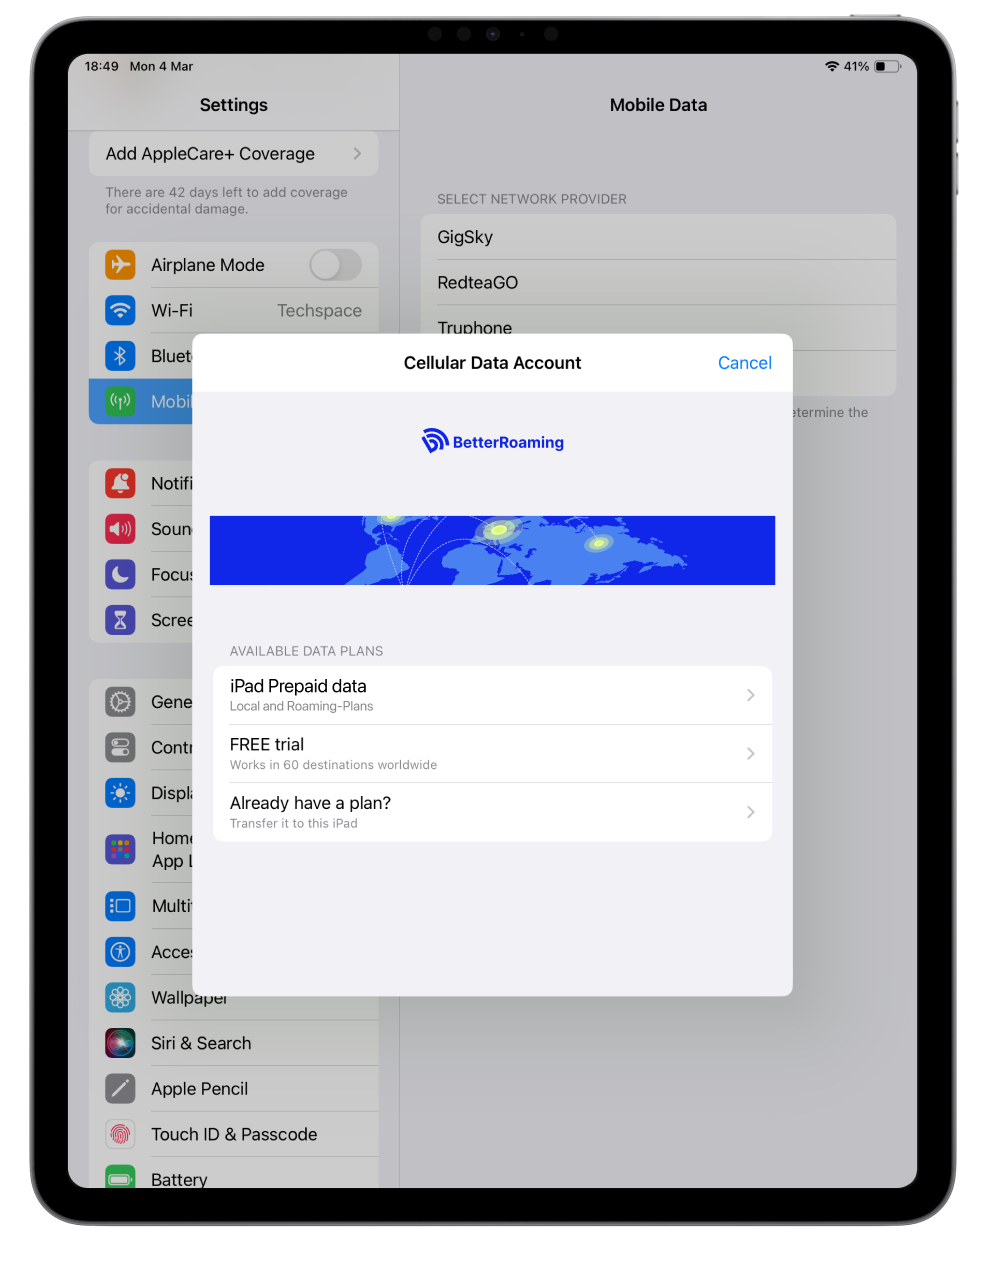
If you already have an active plan on another iPad, you can also select 'Transfer to this iPad'

Free trials receive 100MB of data
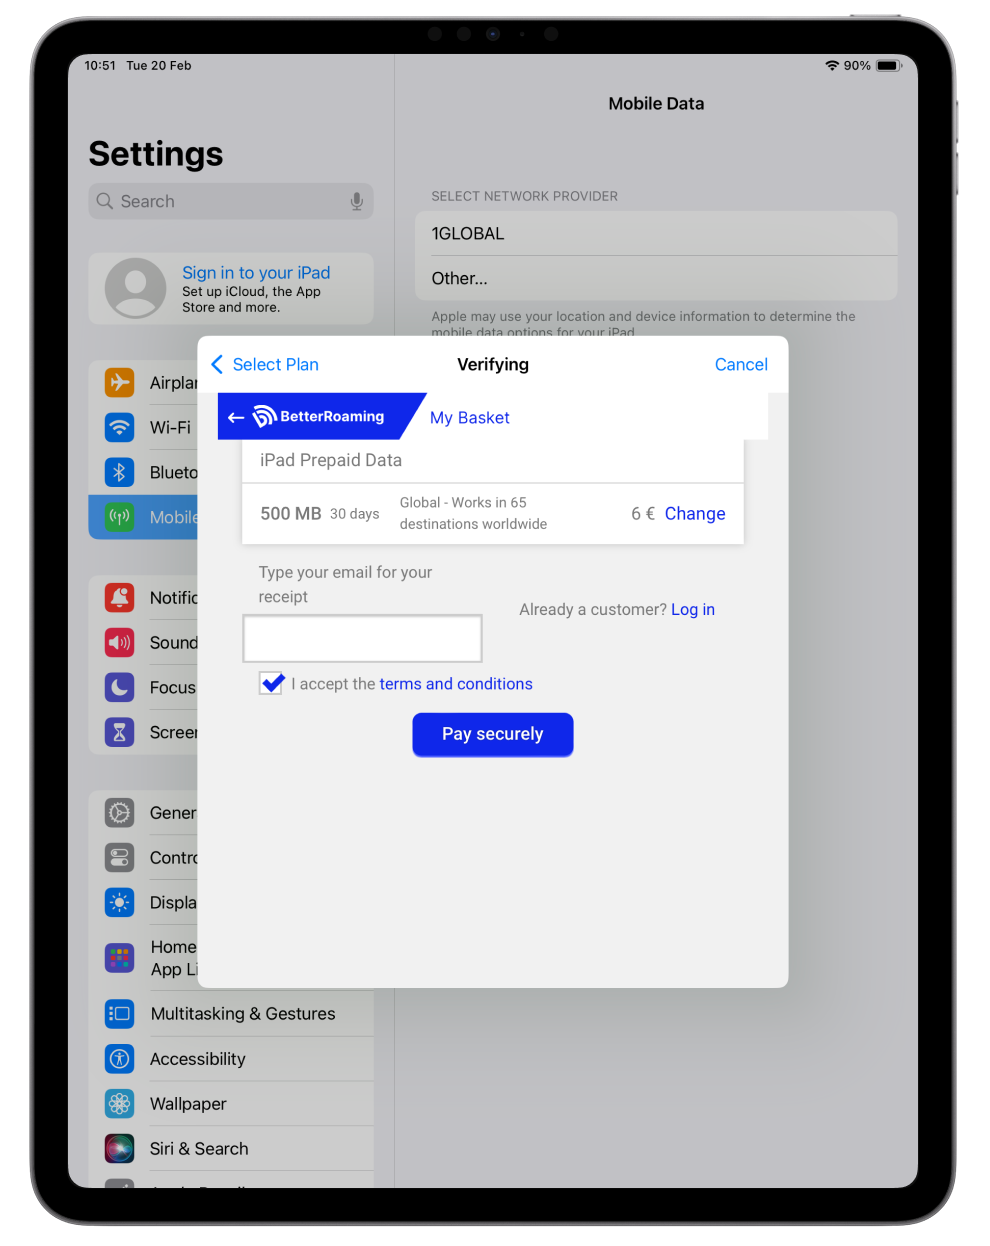
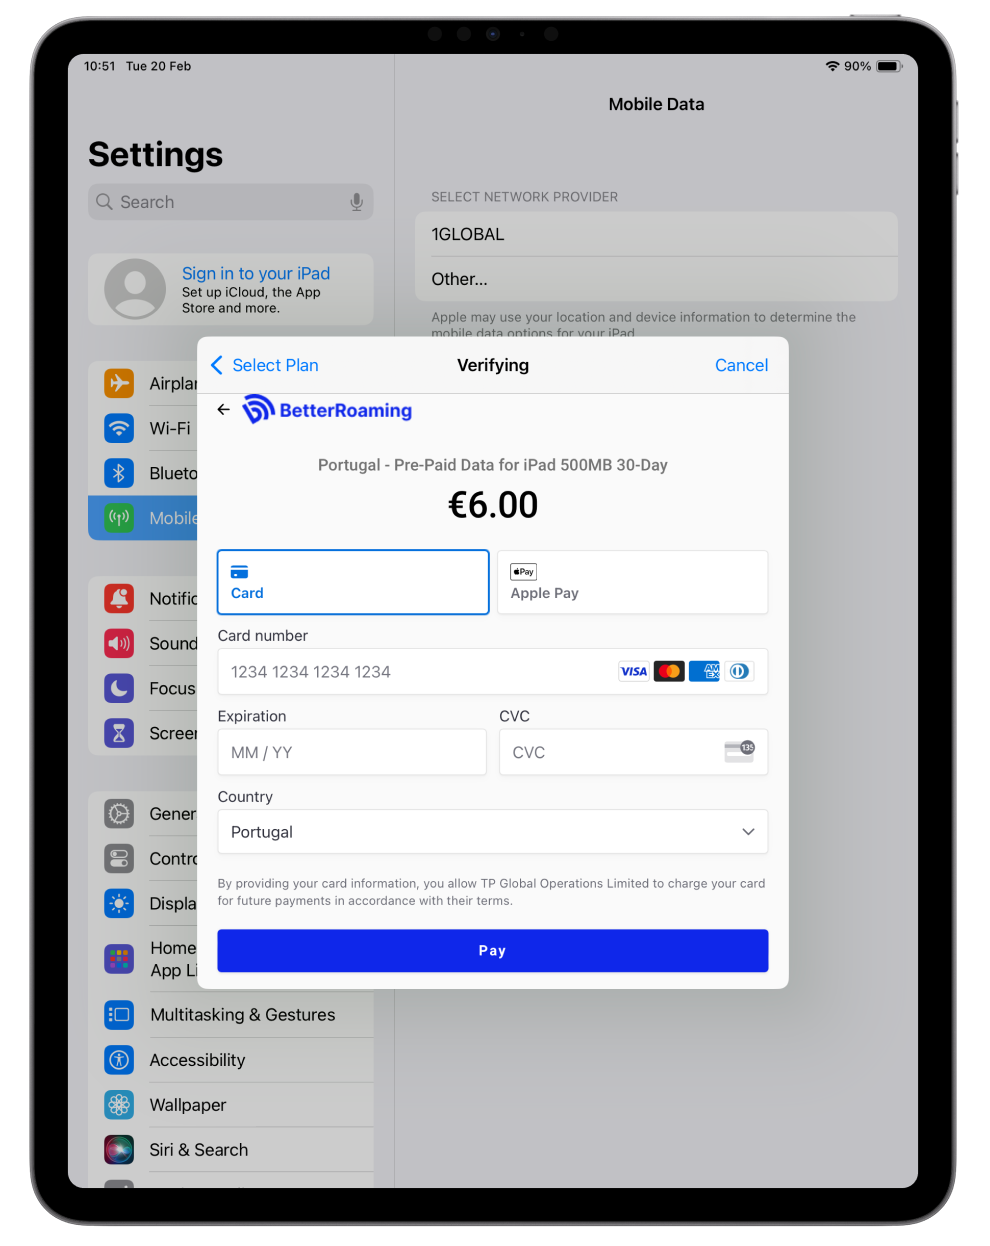
If you have selected a free trial, you don't need to enter any payment info
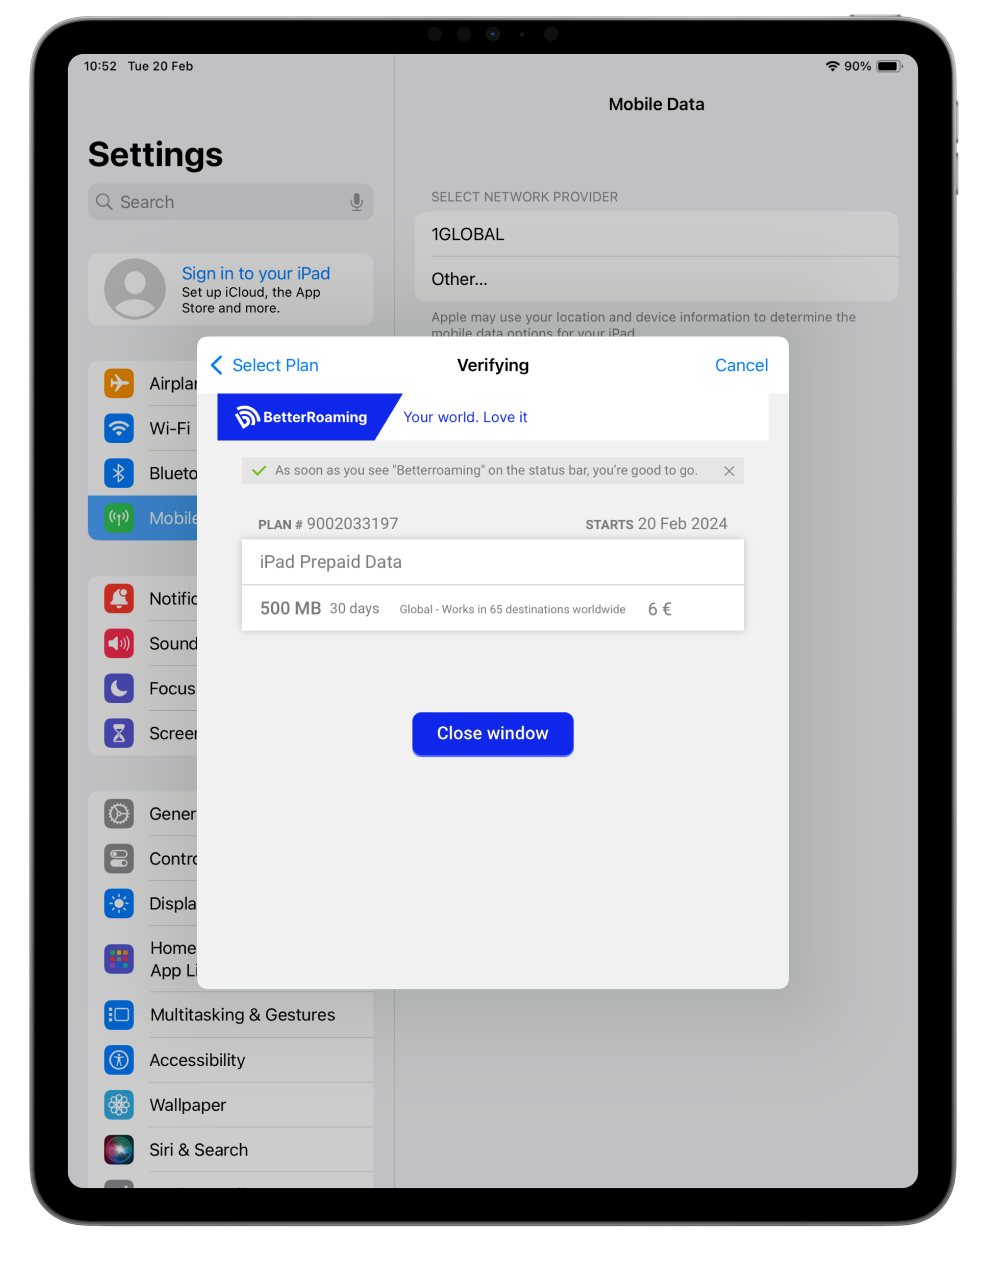
Once connected, you will see BetterRoaming in the status bar at the top-left of your screen